How to List Your Business on Google Maps with ‘Google My Business’
If you have searched for a shop, restaurant or an office address, you would have noticed that a search result with a map listing would have showed up in Google search. Sometimes, this will also have pictures of the business premises, the address and phone number. These results are not automatic. They come up because the business owner has listed his business on Google Maps. It is now time to list your business on Google Maps!
Earlier this feature used to be called Google Places, now it has been changed to Google My Business. This post will show you how to get your business listed on Google My Business.
(adsbygoogle = window.adsbygoogle || []).push({});
Once you list your business there, you will not only get a map result when someone searches for your company name on Google but you will also show up with location and contact info when someone looks up for your place in the Google Maps app in mobile, tablet or desktop.
This is very important because unless you enter the correct address and pin the location on the map, sometimes your business will be listed in the wrong place and your potential customers may end up at the wrong streets looking for you!
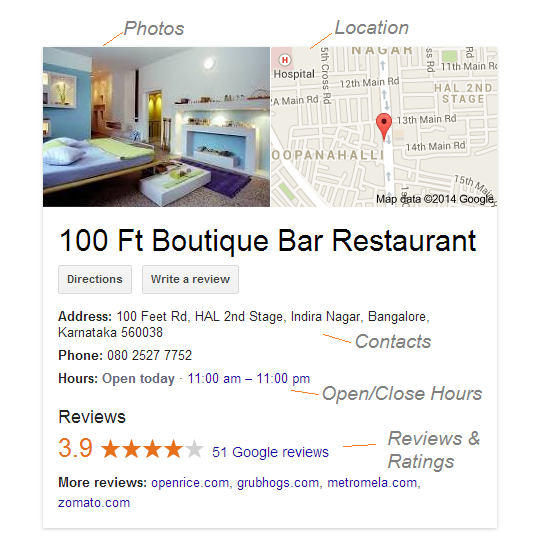
Example Result in Desktop
Here’s an example of what shows up on Google when you search for “100 ft restaurant Indira nagar”. It has photos, map location, address, open/close hours and reviews. You should try to bring such results when someone searches for your brand name.
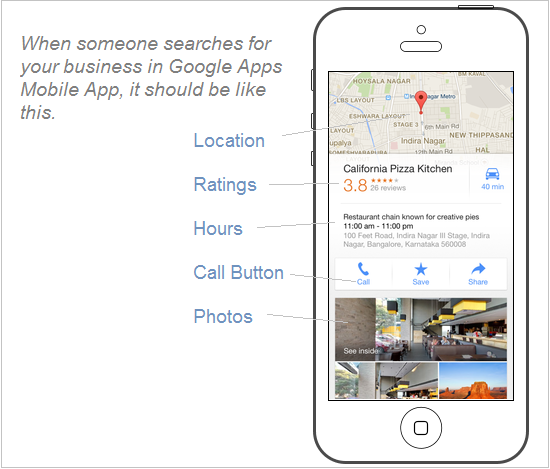
Example Result in Mobile App
When someone searches on the mobile app, the listing should be feature rich like this. The following screenshot shows the result for “California Pizza Kitchen Indira Nagar” in iPhone Google Maps App. (Which by the way is not a great restaurant if you want to have pizzas!).
Step 1: Create & Setup Your Personal Google+ Profile
You need a Google+ page for your business to list your business on maps. Google+ pages can be created only through your personal Google+ profile.
Having your personal profile on Google+ will also help you setup authorship for your blog. Once it is setup and verified, your face will show up along with the search results.
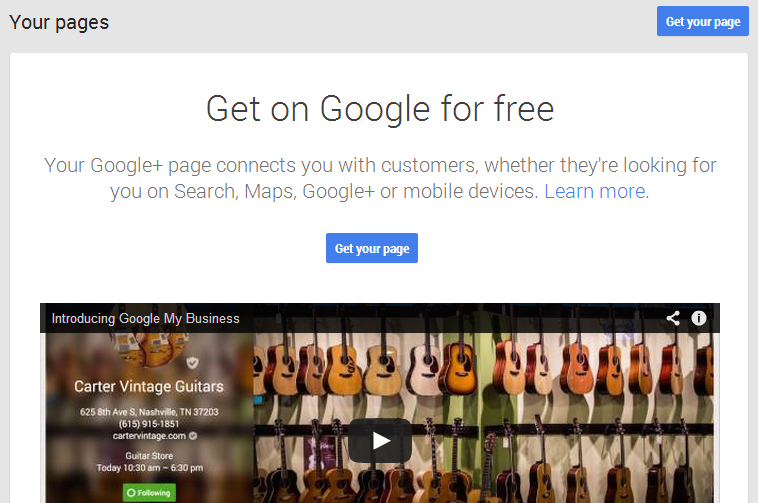
(Update: No photos any more. Google now displays only the name and link).Step 2: Create a Google+ Page for your Business or Brand
If you already have a G+ page for your business go to Step 3. Or from your personal Google+ profile, go to Pages from the left sidebar and you will see the following screen. Click ‘Get Your Page’ to start building your Google+ page.
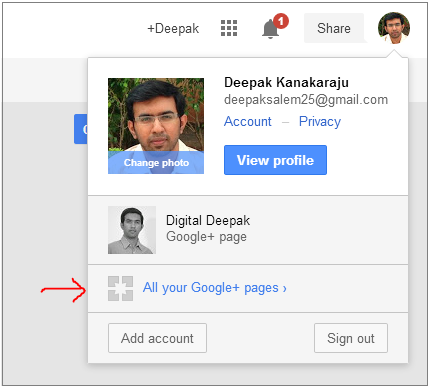
If you already have a Google+ page you can also go to All Your Google+ Pages from the drop down menu on the top right. Then click on Get Your Page.
In the next page you will get three options. Here you have to choose carefully. The first two options will allow you to add an address in the map and the last one doesn’t. According to Google, if you have a business premises where customers walk in, then it makes sense to mark it on the map. However if you want to create a page for your brand (a product line, music band etc.) there is no need to mark it on the map – it wouldn’t make sense.
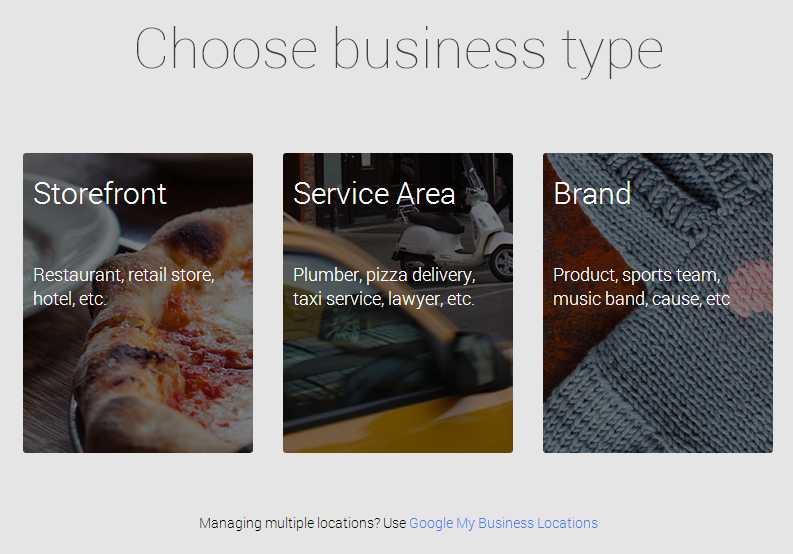
When you click the first and second options, you will be taken directly to the maps. So the creation of a Google+ page is now automatically integrated into the maps using ‘My Business’. One cannot create a Google+ page for a retail store without including a map location.
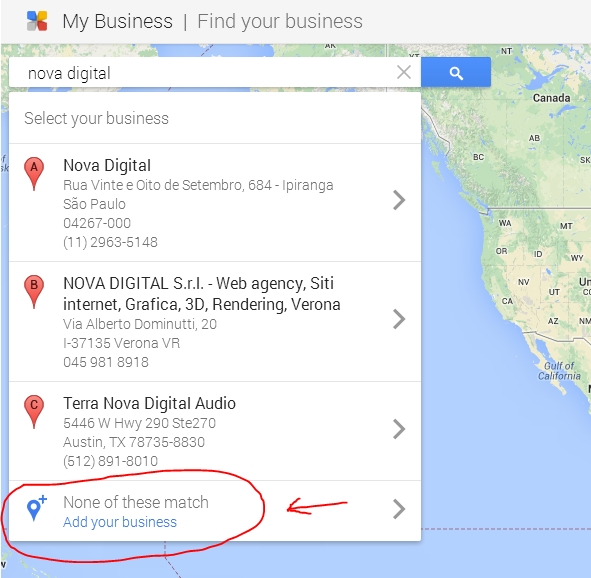
It could get a little confusing here. Google assumes that your business may be already listed on the map and wants you to claim ownership of it. So first you have to try searching for your business even if you know for sure it is not listed. Then you have to click on Add Your Business.
Once you click on Add Your Business you will be taken to the next step where you have the option to enter your business details.
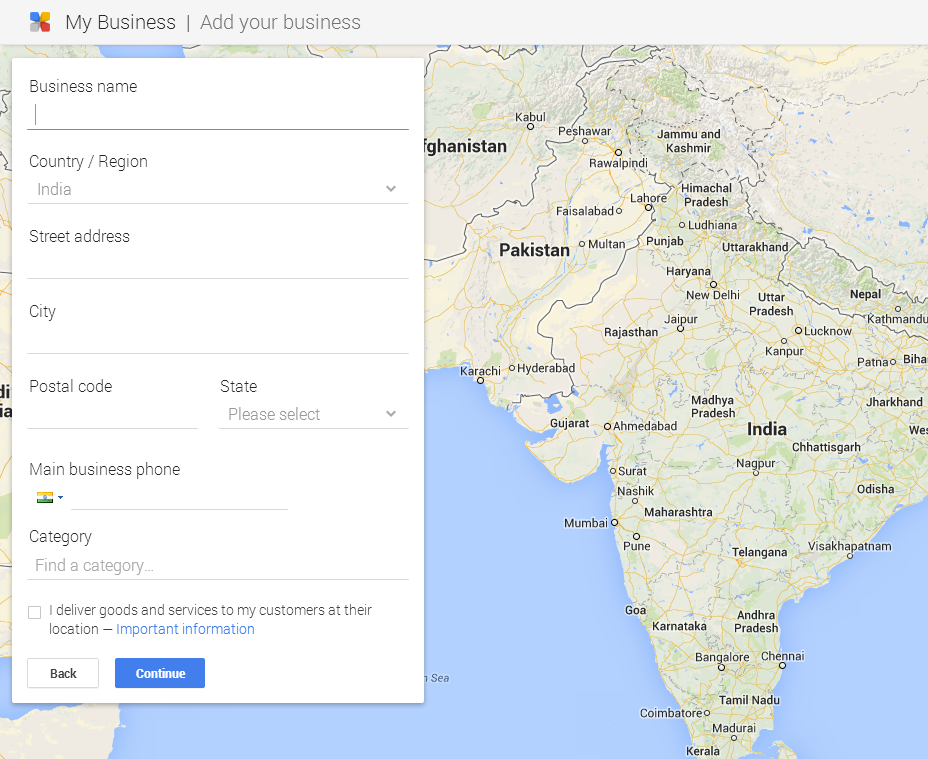
Enter all the details and click continue. Google will confirm your address and then send you a 6 digit verification on a post card to your address. This step helps Google verify your address and make sure that there are not any inaccurate listings on Google Maps.
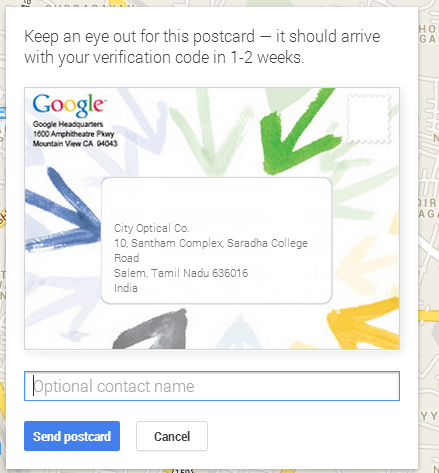
The post card will arrive at your door step within 2 weeks.
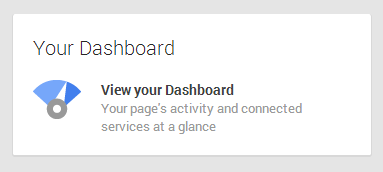
Step 3: View and Edit your Dashboard
All the settings and information about your Google+ page is now bought under a single page called dashboard. Once your page is ready you will see a link on your page called View Your Dashboard.
Once you click on the link you will be taken to a page where you can edit the details about your page such as phone number, website, category, open/close working hours and of course – the address on the map. You can also add photos of your business premises and it would show up when someone searches for your brand name on Google. Try searching for “Digital Deepak” in Google and see the photos of my office!
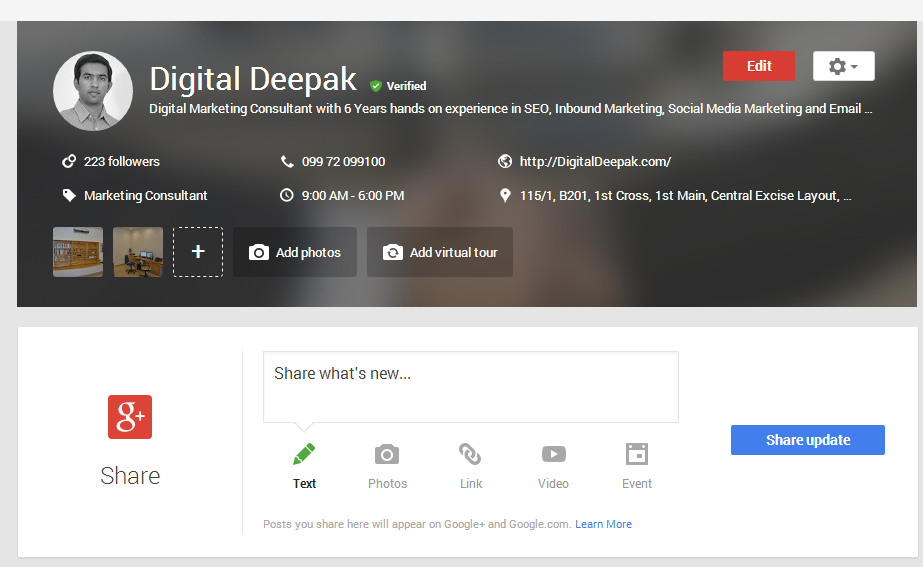
The dashboard also has insights, reviews and analytics. There is something new called AdWords Express which helps you run ads quickly without having to login into the rocket-cockpit style regular AdWords interface. Some options will be unlocked only after you enter the verification code that you get via postal mail.
There is also an option to add a street view style 3D virtual tour. To add that click Add Virtual Tour on the dash board.
Step 4: Keep Everything in Sync
If you are using different Google services for your business it makes sense to bring them all under one Google account so everything gets integrated. For example, the dashboard also shows the number of unique visitors the website has got – this data is taken from Google analytics. So here are the list of 7 services you should bring under the same Google account to make everything easy, seamless and integrated:
- Google Webmaster Tools
- Google Analytics
- Personal Google+ Account
- Google+ Business Page
- Feedburner
- Google AdSense
- Google Adwords
When your website is verified with Google webmaster tools & analytics, Google will also show the latest posts from your blog below the map listing on Google search. This can help you in Inbound Marketing.
Step 5: Get Reviews and Ratings
Having a good review when someone searches for your brand name in Google helps a lot in creating a good brand image. Anyone can write a review for your store, restaurant or product through their Google+ account. You can explicitly ask your fans and followers to leave a review on your Google+ page. Ratings start to appear after a few reviews and ratings have been entered. This how it appears on the right side bar of Google search:

(adsbygoogle = window.adsbygoogle || []).push({});
Need My Help?
I can help you list your business on Google maps. Connect with me on Email or Social media and send me a message. If you have any questions, comment below this post. Looking forward to see your business on Google Maps!