How to Get a Self Hosted WordPress Blog with BlueHost

Starting your own website is one of the best ways to learn digital marketing. Because you will learn all the modules in digital marketing with increasing complexity over time, by applying the principles on your own website.

HTML websites are not easy to make, but you can create a self-hosted WordPress blog on your domain name in no time. You can open a free blog at WordPress.com or Blogger.com but you will not be able to grow your website and make money from it. Because most of the free blogging services are not for commercial use.
If you want to have your own website, a self-hosted WordPress blog is one of the best ways to go about it. First, you need to choose a topic for your blog and then you should register a domain name. You can get a .com or .in domain name or any of the hundreds of extensions available. Then you should buy hosting and install WordPress on it.
In this article, I want to show you how to get a self-hosted WordPress blog with BlueHost, one of the most reputed and reliable hosting services on the web.
Step 1: Sign Up for a Hosting Plan
There are many hosting companies offering hosting plans. BlueHost has a good reputation for quality and support.
Click the following banner to visit BlueHost or you can click here.
BlueHost gives you a free domain name as well with the registration. On the next page go ahead and click on Get Started Now

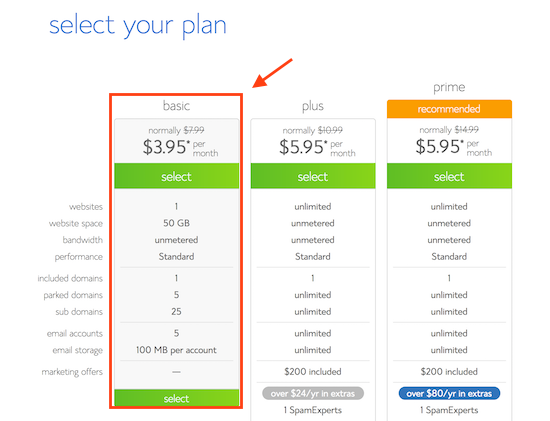
Select the basic plan from the next screen. The basic plan is more than enough for new bloggers. The price will show as $3.95 a month but we can reduce it further in the next step.
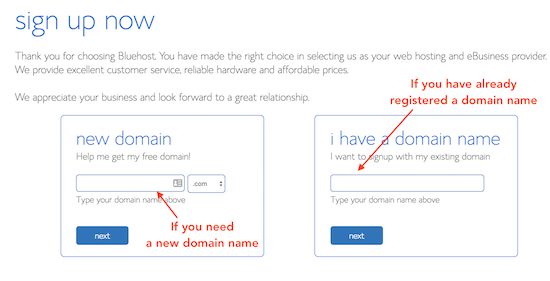
If you have registered a domain name already, go ahead and enter the domain name there. Else, enter a new domain name that will be registered for you along with your BlueHost plan.
In the next step, you have to enter all your personal details. Move the mouse to the top right corner of the screen. They will think that you are leaving their website and will try to retain you by giving an offer. Do this and click on Claim Savings in the next screen.
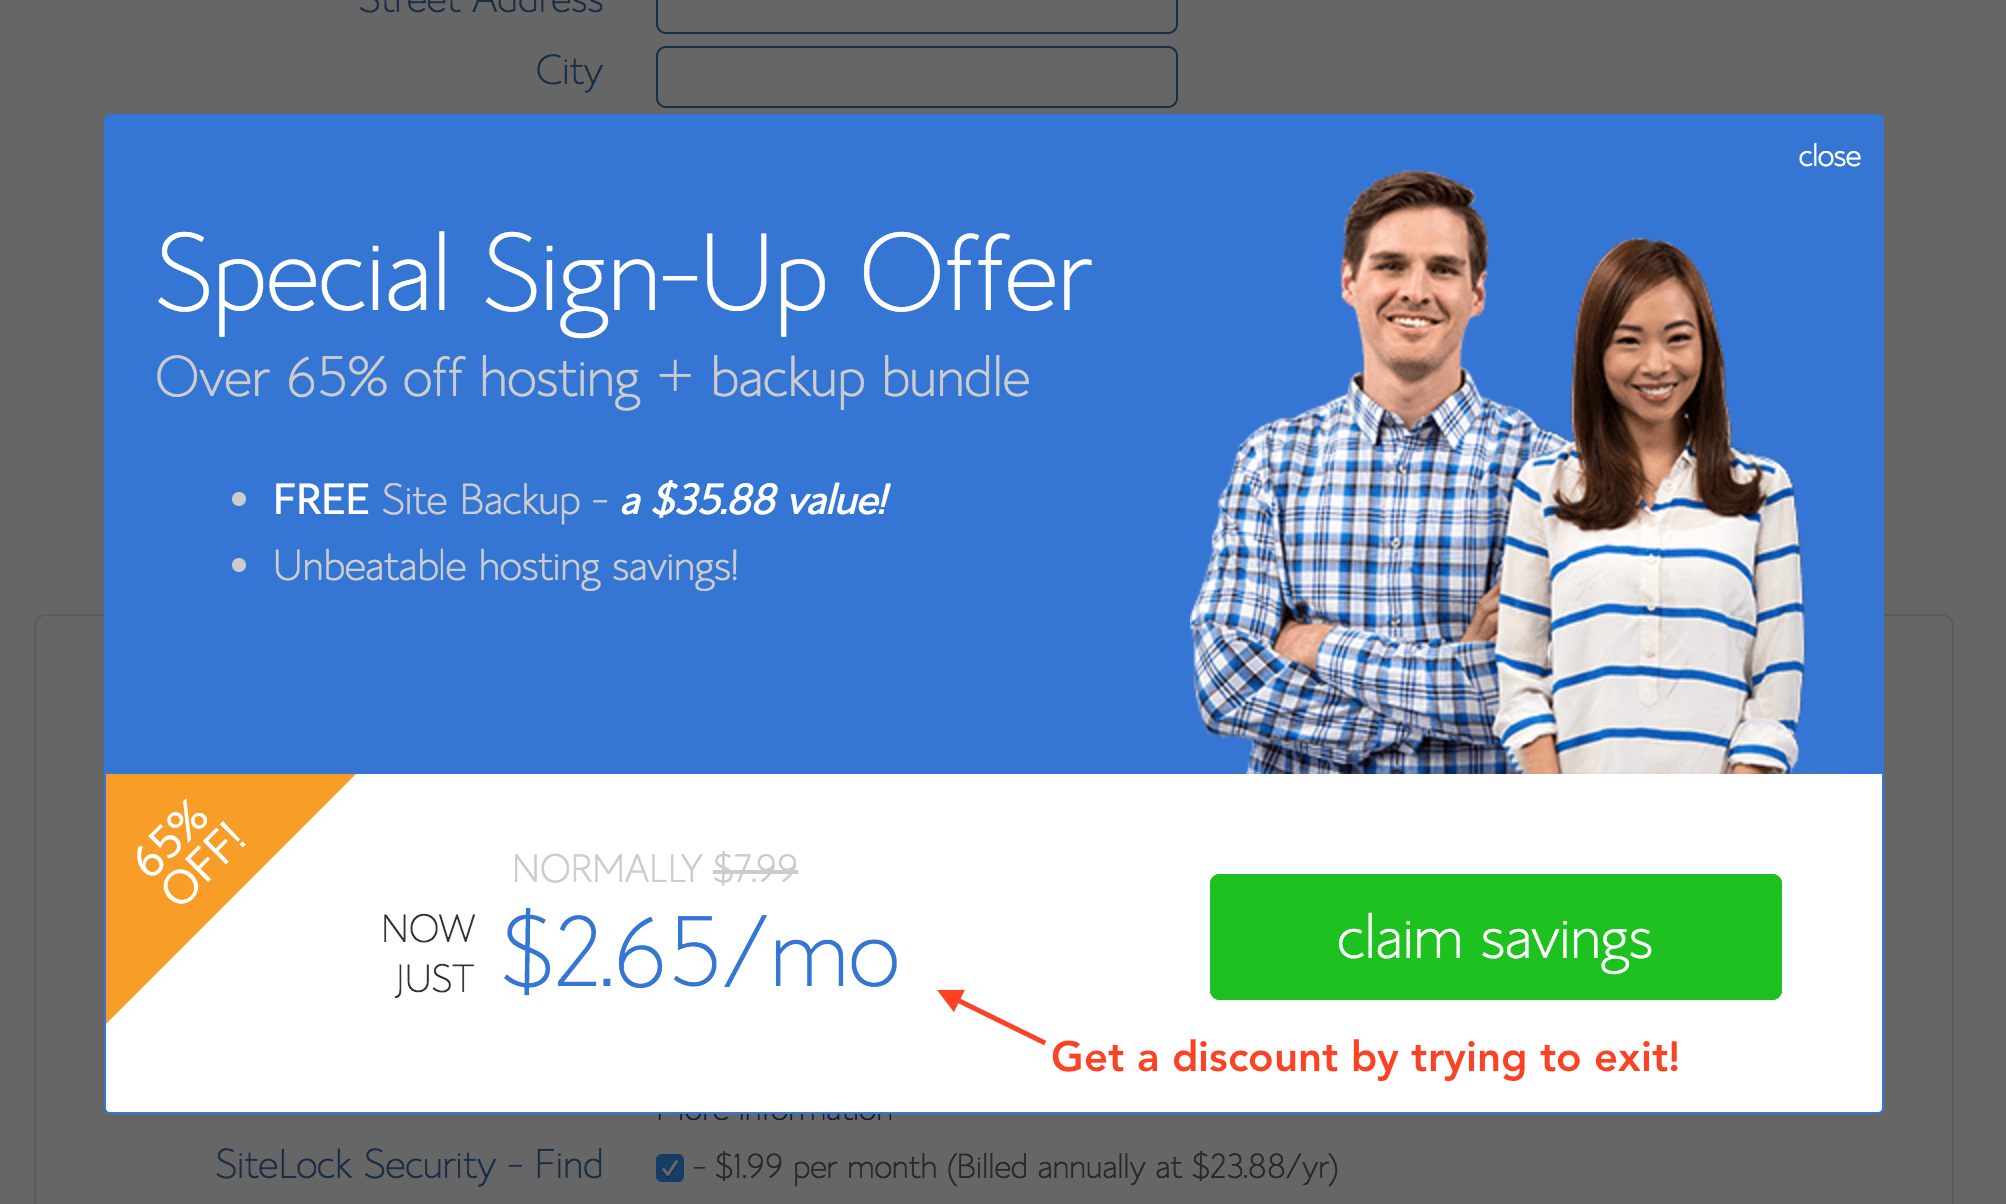
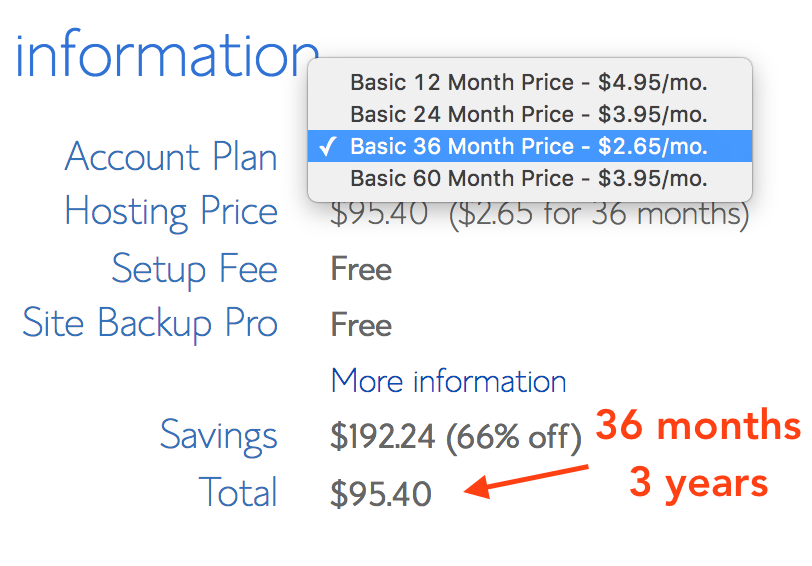
Once you click Claim Savings, the page will reload and you will see a new pricing. You can sign up for the 1 year plan for just $60 or you can sign up for the 3 year plan at ~$95 (I recommend the 3-year plan for the highest savings)
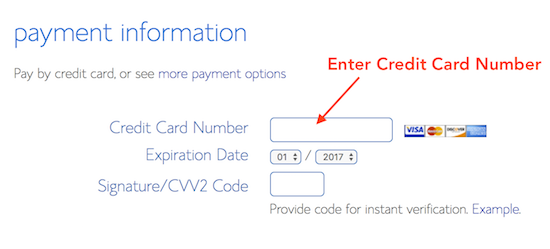
Enter your credit card number in the next step. And then finish the order process. In many cases, a debit card number also works.
That’s it! Your sign up process with BlueHost is done. You have created your Web-Hosting account.
Step 2: Install WordPress with a Few Clicks
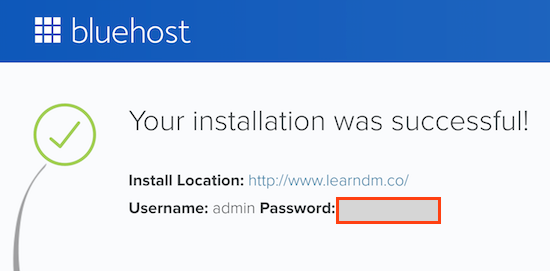
As soon as you finish the sign-up process, you will be asked to create a password. Create your password and login into the dashboard.

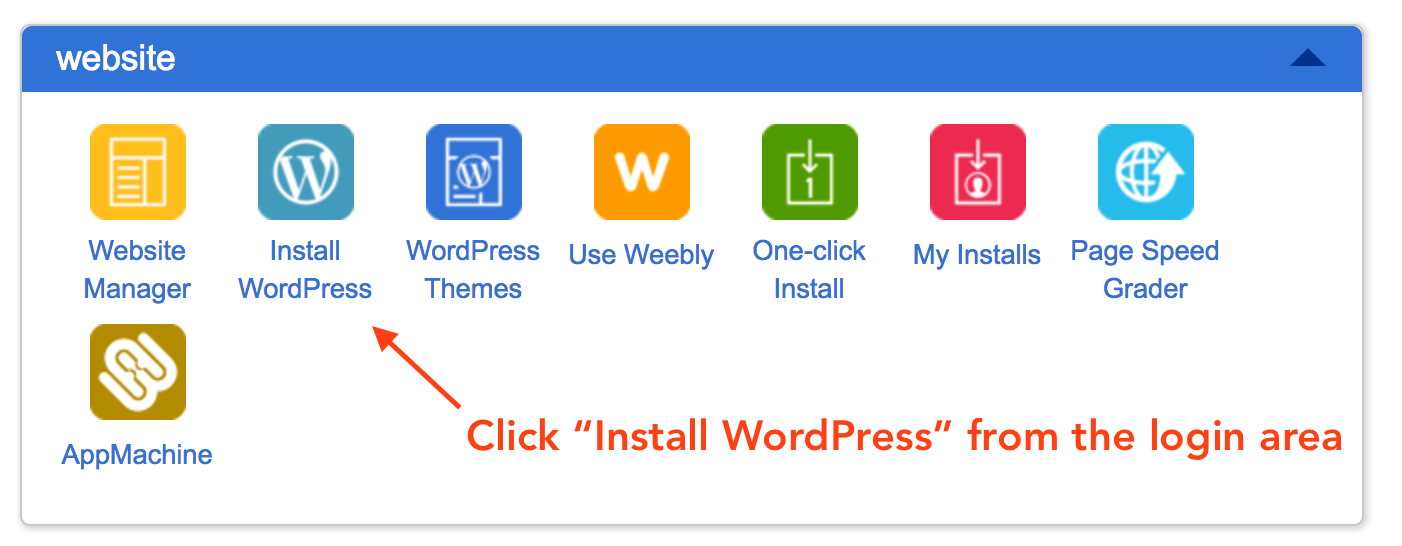
Once you log in, you will see a dashboard like this. BlueHost comes with 1-click WordPress install. Find Install WordPress in the website section and click on it.
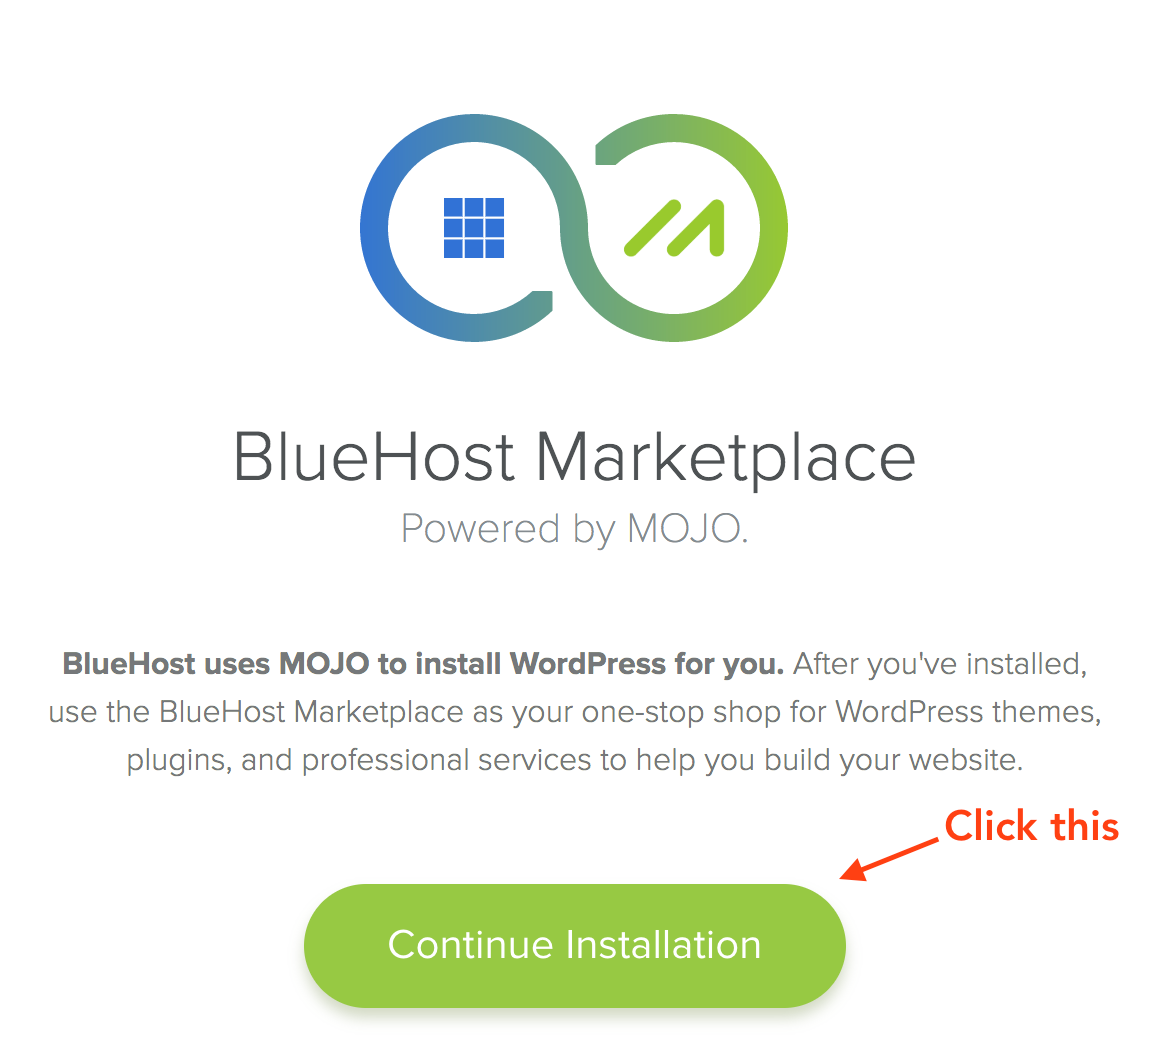
On the next page, click on Continue Installation.
Select the domain on which you want to install the WordPress blog. You will get your domain name by default, you can select that.
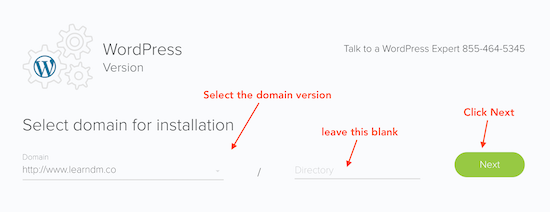
Click next and then your WordPress blog will be installed within a few minutes.
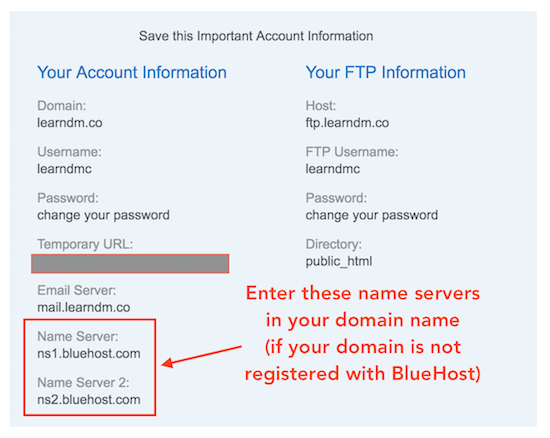
If you have your domain name at some other registrar instead of BlueHost then you have to update your name servers on your domain name.
Your name servers will be mentioned in the welcome email that you have received from BlueHost. It is usually ns1.bluehost.com and ns2.bluehost.com
That’s it. Your WordPress blog is installed and you are ready to go! Start blogging and start learning digital marketing.
You can take a look at my WordPress blog admin area to get some inspiration of how I manage my content.
If you have any questions, leave a comment below! All the best for starting your own blog!